Usability / Volumio->BubbleUPnp / Volume-Potentiometer-Hardware-None

so, 😉

sorry for the lately uninteresting/not so “fresh” news about the ES9038Q2M/ES90xx-chips/boards etc..; maybe that will come back..

today, to keep this blog going, some usability-tricks/tips using a RPI-4B and volumio..->https://volumio.org/get-started/

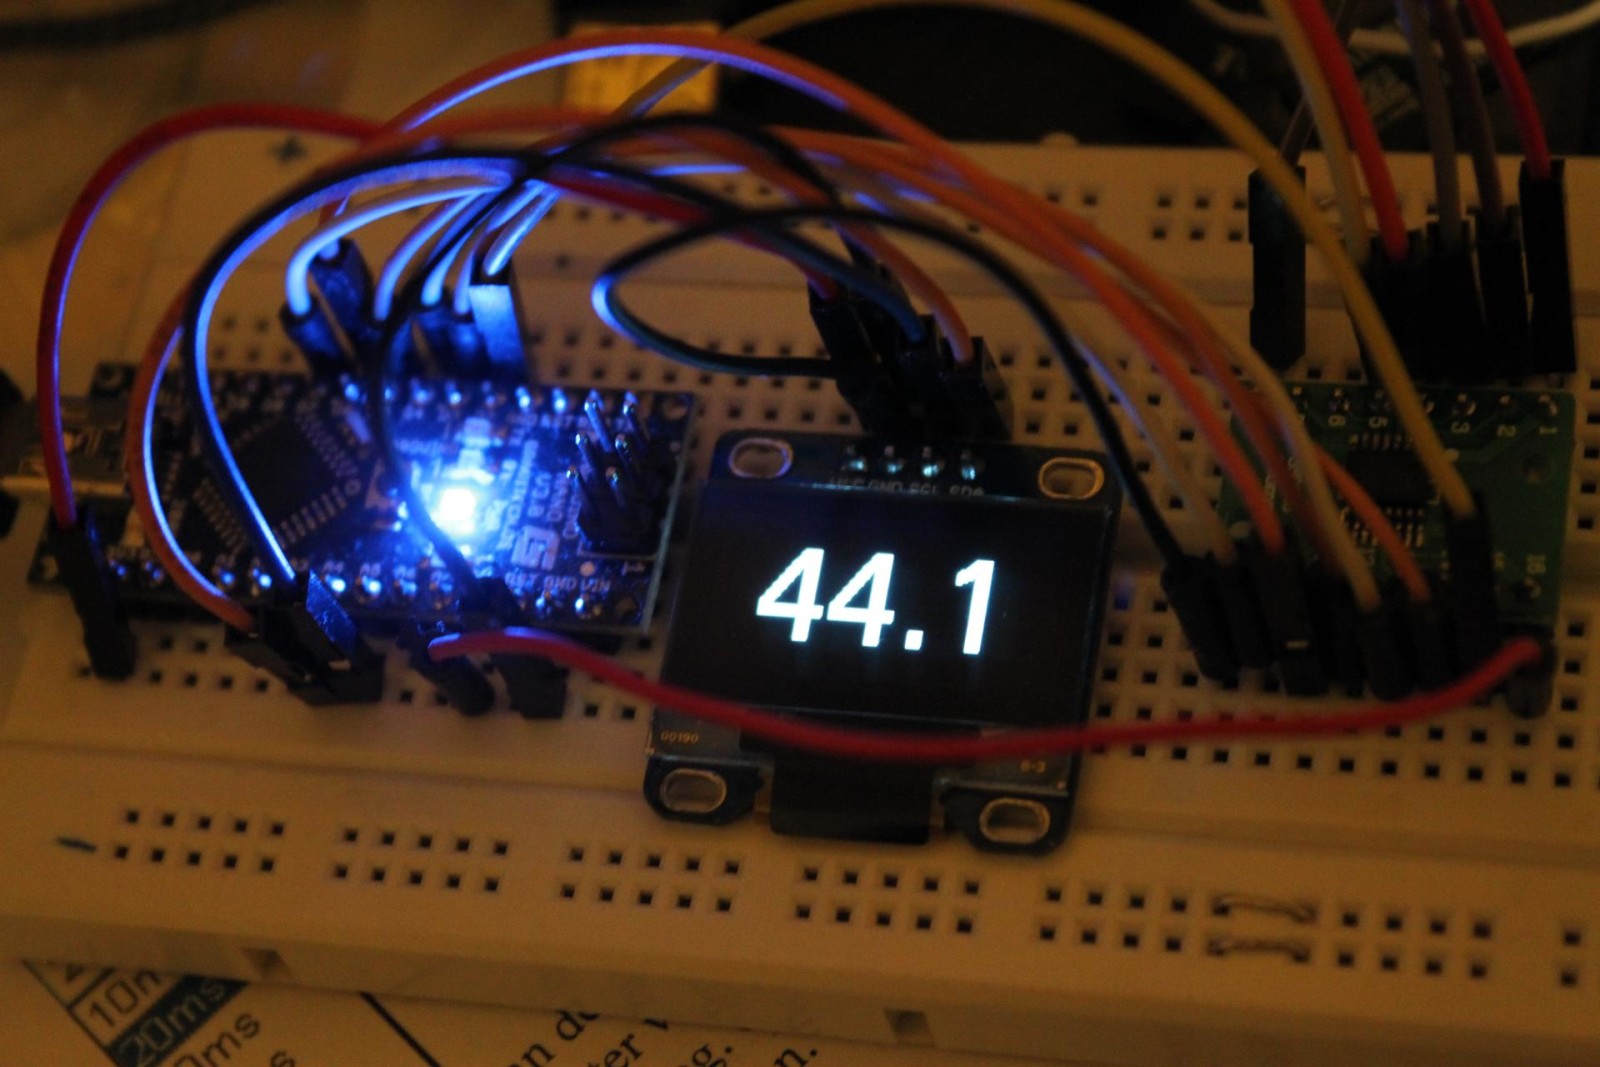
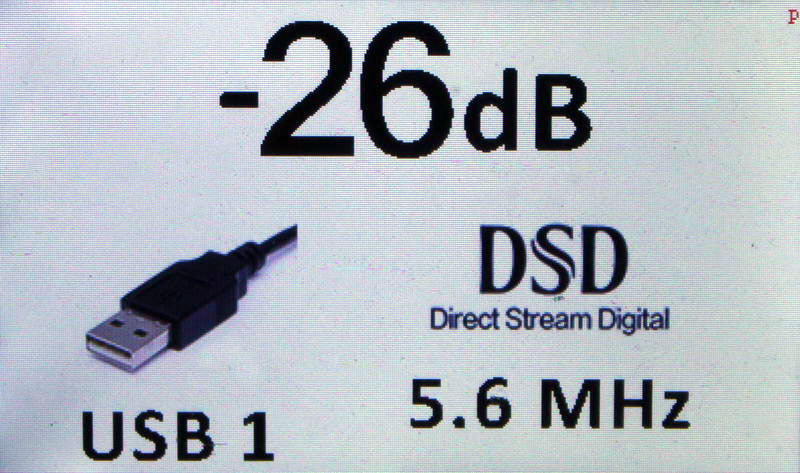
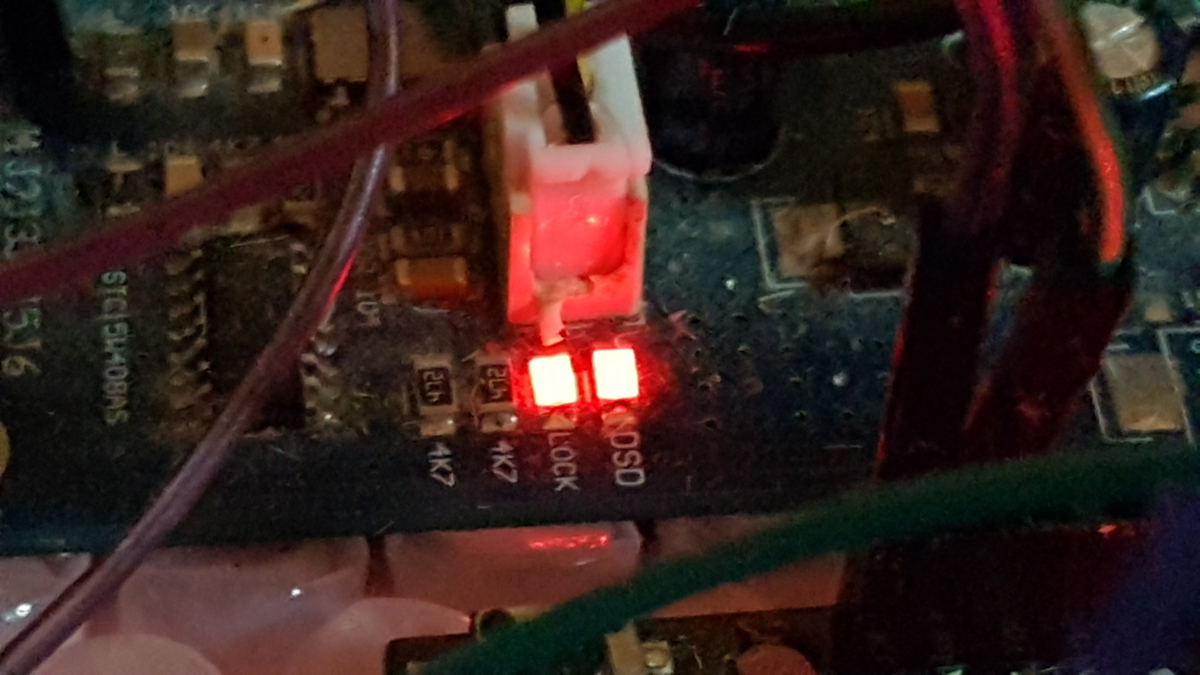
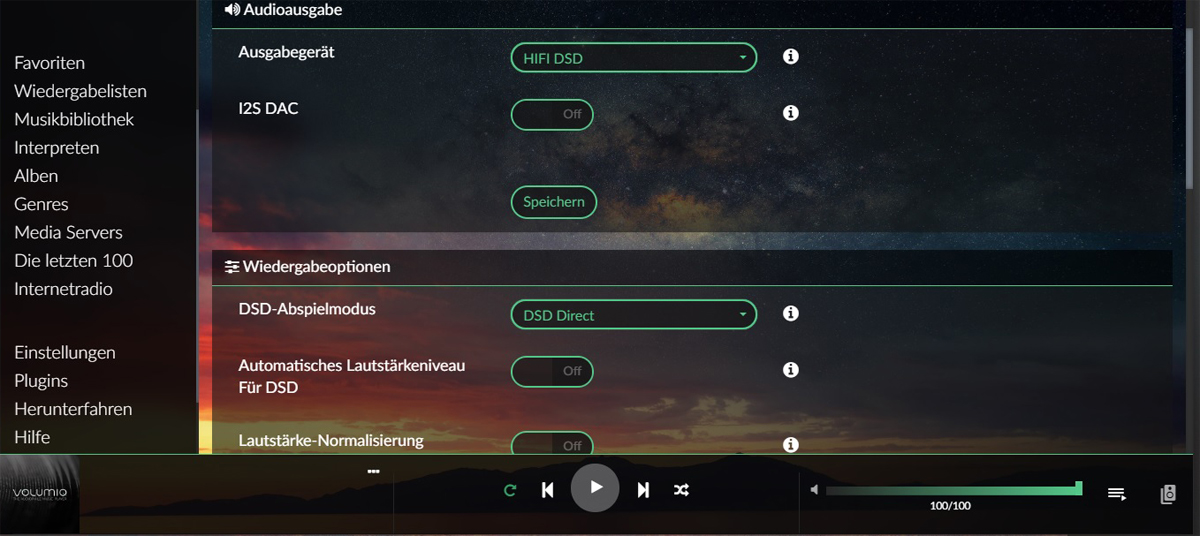
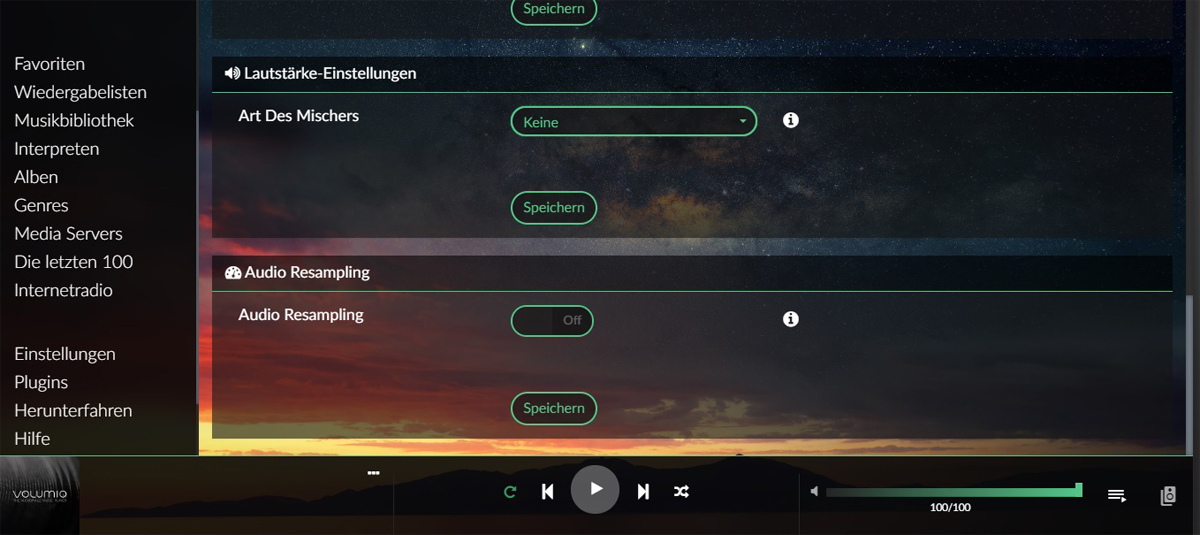
runs fantastic (imo), is absolutely DSD-capable (remember to use an USB-bridge (XMOS or Anamero) “in-between” and set volumio on “DSD-direct”,”no mixer”, “no resampling”-> else u wouldn´t get the red/torquise DSD-lock-light on the ES9038Q2Ms..->

by that i´ve tried a lot of dlna-apps for volumio and best for me so far is->BubbleUPnP->LINK

there are millions of other (“Mediahouse etc.,etc.,”) but imo, BubbleUPnp correspondends superb with volumio..u can see in BubbleUPnP whats playing, can change the volume via the “normal” volume-keys and u can also play/send .mp4/.mkvs etc.  to volumio and it plays only the audio/tracks..great ! 😉

by that i´ve bought a 10kohm-poti again (wire-diagramm here->http://essabre-90xx-rpi.sfb2.com/?p=1660  ) and although we have a web-volumecontrol with a MCP4131 “here”->http://essabre-90xx-rpi.sfb2.com/?p=1306

i still thought its “usability-wise” better to use an old-school (analogue) poti but its still the same problem as first: u have only a very short range (i guess 35 degrees) from full to nothing and u have to turn it manually ;-)(but u are nearer on it 😉 )..still doesnt know the right conclusion for me, still in testing 😉 )..

greets for now and more to come !! 😉

DIY-DAC: Display Audio-params->already there->HiFiDuino-TFT../too complicated at present..

so, 😉
after listening for days through this super phenomenal Skysong-XMOS-USB-ES9018K2M-Combo (a really hifi-upgrade by 10-15%) i came back to my STM32F103-“Bluepill”/Arduino project to build your own DAC/display audio-parameter (Input,sample-frequency and so on)..
and i knew there was already such a project and it was !!!!
its the HiFi-Duino-TFT-Project on http://www.dimdim.gr/arduino/tft-hifiduino-code/ !!! (based on the famous/original HiFi-Duino-project/code; is well known)
and here->Universal USB to I2S Interface Indicator->http://www.dimdim.gr/arduino/universal-usb-to-i2s-interface-indicator/

after reading the documentation about it, our “F0,F1,F2,F3,DSD-on etc”-schematics became a really new sense->they were already used by this above mentioned code for example and also in conjunction with the Anamero-Combo-boards..look here->

the code looks like this->
// —————————- Amanero ——————————————————————————
#ifdef Amanero
/*
* I1 = F0
* I2 = F1
* I3 = F2
* I4 = F3
* I5 = DSD_ON
* I6 = DSD 64 or 128
*/
// Check for PCM or DSD
if (digitalRead(I5) == false) // PCM detected
{
type = 0;
if (digitalRead(I1) == false && digitalRead(I2) == false && digitalRead(I3) == false && digitalRead(I4) == false)
{
SR = 32;
……………
}
else if (digitalRead(I1) == true && digitalRead(I2) == false && digitalRead(I3) == true && digitalRead(I4) == false)
{
SR = 176.4;
}
..
else if (digitalRead(I1) == true && digitalRead(I2) == true && digitalRead(I3) == true && digitalRead(I4) == false)
{
SR = 352.8;
}
else if (digitalRead(I1) == false && digitalRead(I2) == false && digitalRead(I3) == false && digitalRead(I4) == true)
{
SR = 384;
}

and so on !! burner 😉  ..
you can get the sketch here->Link or via the forum (http://essabre-90xx-rpi.sfb2.com/forum/); i will upload it there later too..
so to see, the absolute breakthrough i would say 😉
but this are only “teaser”; for me its absolute to complicated right now/at present and i don´t know if i continue to “walk on this way”/have the time for it in the near future but for introduction..
greets for now 😉